It is this crown shaped wall hanging for my daughter's room. I picked up the paper mache shape at my local craft store. It only took my about 30 minutes to complete. It came together really quick. I first painted the edges pink and used the polka dot paper to cover the top. I added glitter to the edge. It helps cover up some of the imperfections in my cutting. Then I started embellishing until I was happy with it. I loved that Sn@p Card saying so I knew I wanted to use it somehow. I'm really happy with how it turned out.
Showing posts with label altered items. Show all posts
Wednesday, September 23, 2015
{Scrappy Goodness} Altered Crown
Today I want to share with you an altered item I created using Simple Stories So Fancy Line.
It is this crown shaped wall hanging for my daughter's room. I picked up the paper mache shape at my local craft store. It only took my about 30 minutes to complete. It came together really quick. I first painted the edges pink and used the polka dot paper to cover the top. I added glitter to the edge. It helps cover up some of the imperfections in my cutting. Then I started embellishing until I was happy with it. I loved that Sn@p Card saying so I knew I wanted to use it somehow. I'm really happy with how it turned out.
Have a beautiful day! Smiles, Jessica
It is this crown shaped wall hanging for my daughter's room. I picked up the paper mache shape at my local craft store. It only took my about 30 minutes to complete. It came together really quick. I first painted the edges pink and used the polka dot paper to cover the top. I added glitter to the edge. It helps cover up some of the imperfections in my cutting. Then I started embellishing until I was happy with it. I loved that Sn@p Card saying so I knew I wanted to use it somehow. I'm really happy with how it turned out.
Labels:
altered items
,
FotoBellaDT
,
home decor
,
scrappy goodness
Wednesday, March 25, 2015
{Scrappy Goodness} Monogram Letter
Happy Day to each of you. Today I wanted to share a quick tutorial of how to create fun monogram letters. I created this one for my mother-in-law using the Graphic 45 Artisan Style Bundle. It is really easy.
I started with a plain wood letter. I selected a B but you could do anything. I then painted the back side black.
Hope you enjoyed.
Have a beautiful day! Smiles, Jessica
I started with a plain wood letter. I selected a B but you could do anything. I then painted the back side black.
I then traced the letter onto the paper I wanted to use.
Then cut the paper out and attached it to the front side of the letter. I then added some paint around the edges to finish it off a little.
Then selected some of the embellishments from the line to create clusters on opposite sides.
I then added a few dangling beads and bling to finish it off.
Overall finished product.
Hope you enjoyed.
Have a beautiful day! Smiles, Jessica
Labels:
altered items
,
FotoBellaDT
,
scrapbooking
Monday, September 15, 2014
{Scrappy Goodness} Halloween Decor
It is that time again! Time to get ready for Fall and Halloween. This week I wanted to share with you a home decor project I did to help decorate my house for Halloween. I used the cute new My Mind's Eye Frightful Bundle from FotoBella.
I picked up the cute wood ghost and wood pumpkin from my local hobby store. I then painted each one black, covered it with paper and painted the edges with black a little for some added dimension. Then proceeded to embellish until I liked the small clusters of items. I am super happy with how they turned out. Now to find a good place to hang them in my house for the Halloween season.
Make sure you hop over to FotoBella and snag a bundle of your own before they are gone.
Have a beautiful day! Smiles, Jessica
I picked up the cute wood ghost and wood pumpkin from my local hobby store. I then painted each one black, covered it with paper and painted the edges with black a little for some added dimension. Then proceeded to embellish until I liked the small clusters of items. I am super happy with how they turned out. Now to find a good place to hang them in my house for the Halloween season.
Overall:
A few close-ups of the pumpkin:
A few close-ups of the ghost:
Make sure you hop over to FotoBella and snag a bundle of your own before they are gone.
Have a beautiful day! Smiles, Jessica
Labels:
altered items
,
FotoBellaDT
,
holidays
,
scrapbooking
Monday, April 7, 2014
{Scrappy Goodness} Photo Box
Hello Today I am sharing a tutorial on how to create this photo box over on FotoBella's blog today. I wanted to share the pictures of the box here as well though. I used the Bo Bunny Our Lil Monster bundle.
I created this out of cereal boxes that I cut down and taped together to make a basic box. I then covered it with paper and embellished until I was happy.
Have a beautiful day! Smiles, Jessica
I created this out of cereal boxes that I cut down and taped together to make a basic box. I then covered it with paper and embellished until I was happy.
Have a beautiful day! Smiles, Jessica
Monday, September 9, 2013
{Scrappy Goodness} Picture Frame
Happy Monday Everyone! I'm very sorry to be MIA for the past week. I was moving and sick at the same time. I just didn't make it to the blog last week. I'm still unpacking and finding stuff. It is an on going long process, for sure.
However, I wanted to take a moment and share a picture frame I made recently. I used Bo Bunny's C' est La Vie line. It is such a beautiful line. I wanted to create this quick picture frame as a present. I love making these frames because they are something you can usually whip up quickly for presents. The colors in this line are absolutely fabulous. I used one sheet of paper and the 12x12 chipboard sheet to create this. Along with some pearls I had in my stash.
I painted the picture frame with paint I had. Once, I cut my paper down to the size of my frame I used mod podge to glue it all down. I then just started layering the chipboard pieces until I got the look I wanted. I also added glitter around the inside edge for extra bling factor. I then cut down the backside of some of the paper that was left over to add the Follow your Heart to the opening of the frame.
Let's take a look at the overall:
And a few close-ups of the finished product...
Thank you for stopping my today!
Have a beautiful day! Smiles, Jessica
Labels:
altered items
,
inspiration
,
Scrapbooks-PlusDT
Tuesday, July 23, 2013
{Scrappy Goodness} Love Picture Frame
Welcome to Use It Tuesday Design Team reveal. Today's challenge is What was I thinking, which is what I said halfway through punching all these hearts out. Then said it again as I was gluing each individual heart down. I do have to say that I really love how it turned out. I'm glad I took the time to do it.
The picture frame and flocked paper I have had in my stash for a couple of years. The love sticker has been in my stash for about three years.
I hope you will hop over to the Use It Tuesday blog and check out what the other design team members did for this weeks challenge. As always we would love for you to link up your own take on our challenge this week.
Thank you for stopping by today and checking out my project.
Have a beautiful day! Smiles, Jessica
The picture frame and flocked paper I have had in my stash for a couple of years. The love sticker has been in my stash for about three years.
I hope you will hop over to the Use It Tuesday blog and check out what the other design team members did for this weeks challenge. As always we would love for you to link up your own take on our challenge this week.
My project for the challenge...
A few close ups...
Thank you for stopping by today and checking out my project.
Have a beautiful day! Smiles, Jessica
Labels:
altered items
,
challenges
,
scrapbooking
,
Use It Tuesday DT
Monday, April 15, 2013
Recycled Baby Food Jars
I have a post up today on Scrapbooks-Plus Blog about how to make these cute little guys. They make great gifts and are great way to reuse your those jars instead of just throwing them out.
You can check it out the post here.
Have a beautiful day! Smiles, Jessica
Friday, April 6, 2012
Family Picture Frame
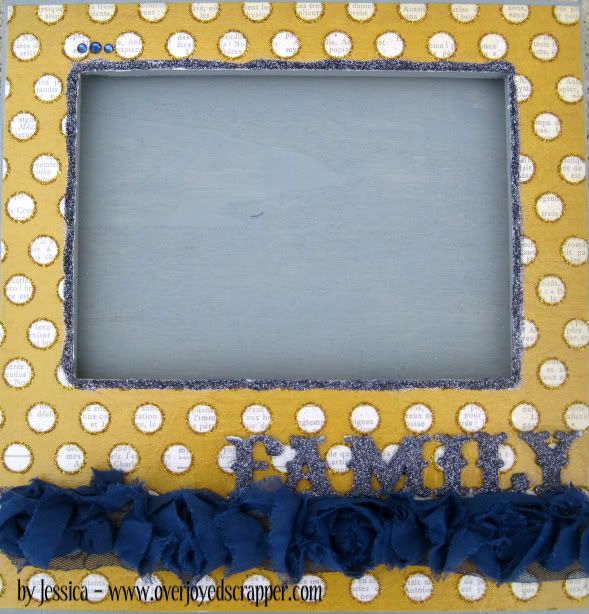
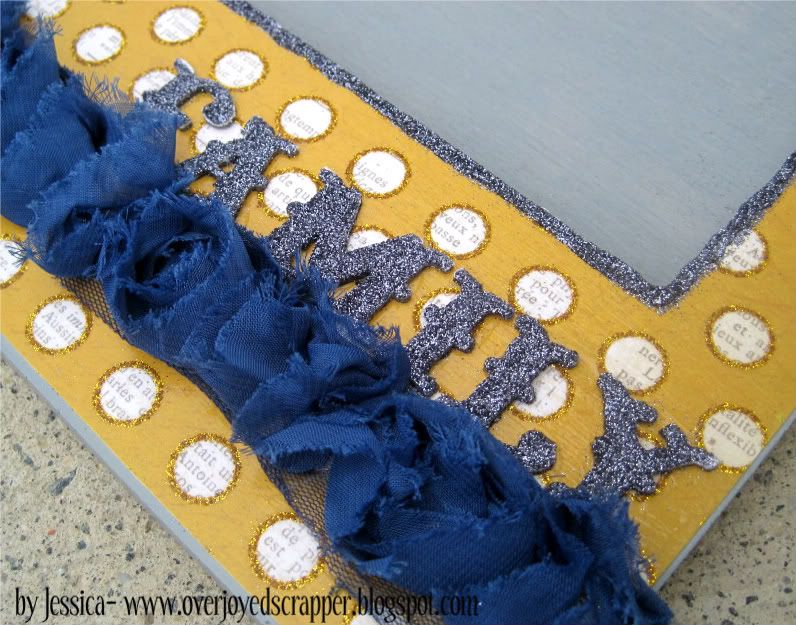
I am really loving creating picture frames! They are such an easy gift to create for someone. I also love that they can be crazy detailed or super simple. This is one I did for my sister. It is very simple but I love the elegance of it. I used the My Mind's Eye paper for the base. Then added my own glitter to some plain white thickers, add some ribbon, few rhinestones and you are done. The longest time was waiting on the mod podge to dry.
Thank you for looking! Hope you enjoy.
Monday, August 22, 2011
Somebirdy Loves You
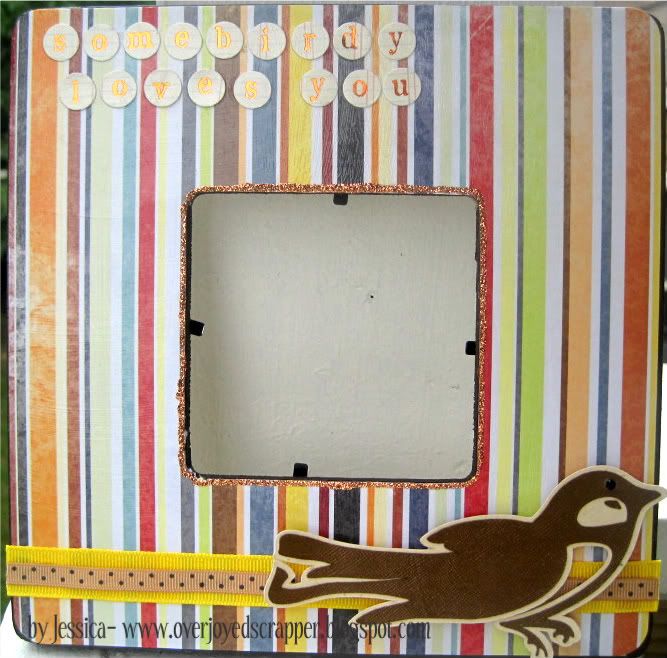
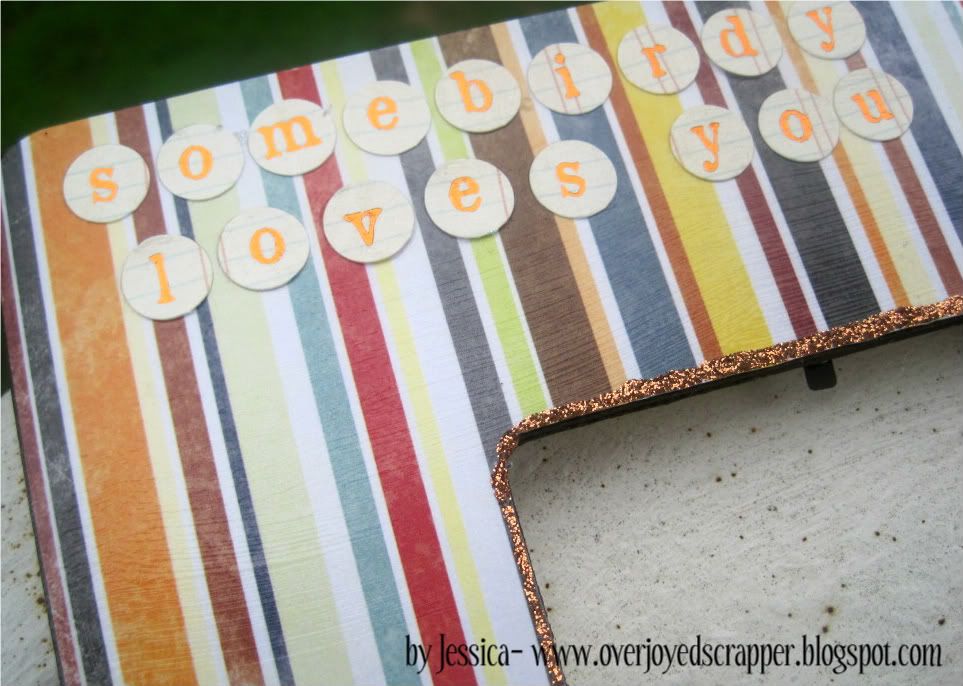
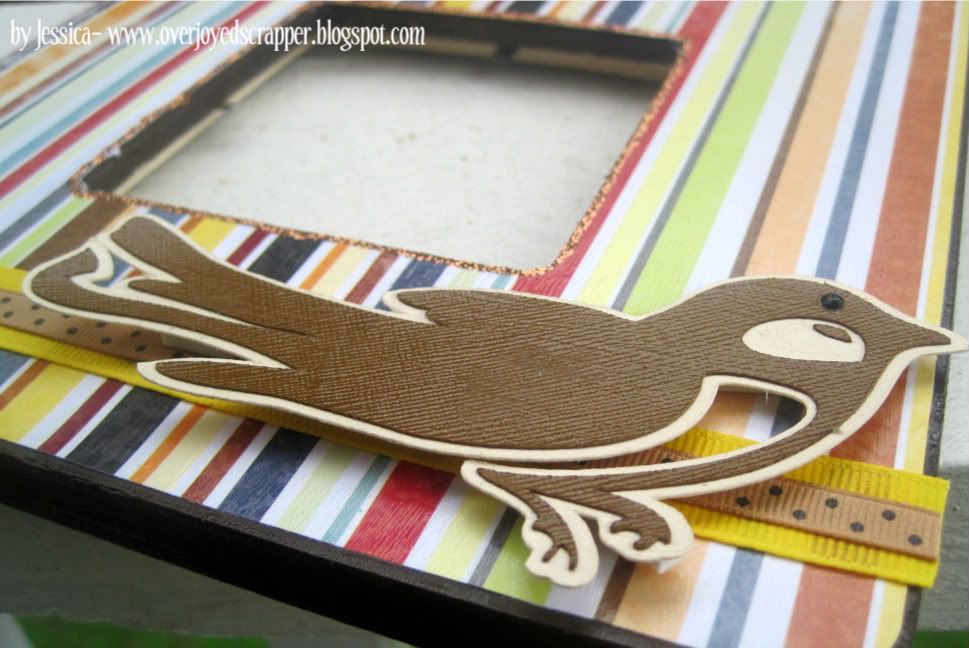
Lately, I have been loving making these altered picture frames. They make great gifts and they are really fast to make. My husband keeps telling me I should sign up for some craft fairs to sell them. We will see maybe some day.
I actually made two of these. One for my dad and one for my father-in-law. I found this paper at Michael's and bought all of it because it was on clearance. I find I never have enough boyish papers. I guess because I have a daughter, I naturally pick up the girly stuff.
Anyways, I hope you enjoy!
I actually made two of these. One for my dad and one for my father-in-law. I found this paper at Michael's and bought all of it because it was on clearance. I find I never have enough boyish papers. I guess because I have a daughter, I naturally pick up the girly stuff.
Anyways, I hope you enjoy!
Monday, May 16, 2011
Card Box
Today I am sharing with you the box that I created to hold all the cards I made for my mother-in-law's mothers day gift. I am really proud with how it turned out. The paper is from a paper stack by DCWV. I used a cake box that I had saved from baking a cake for my hubby's birthday last month.
Hope you enjoy!
Sunday, March 27, 2011
Happy Birthday, Husband You are...
I don't know about everyone else, but I feel like I'm starting to run out of new ideas for gifts. I guess I tend to fall back on ones that are easy and fast for me to do. My husband's birthday is today! We went a little overboard with Christmas this year so we decided not to really do anything for our birthday's this year. But, I had to at least bake him a cake and I put this little canvas together for him also.
I started with a blank 8x10 canvas. Then I painted the edges a tan color to match the paper I was using. I always cut my paper about an inch smaller than the size of the canvas. I think it makes it easier to not have to worry about over hang and trimming and so forth. I then typed and printed my journaling strips and cut them up. I wanted to keep it smile so I just added some buttons and a little heart to the bottom. It took be about an hour. Fast, easy and simple.
I think he will love it. He is my biggest fan, so I pretty sure he will.
Enjoy!
Saturday, February 5, 2011
Feel Love Blog Hop
Welcome to Feel the Love Blog Hop! If you just stopped by my blog today, you can start at the beginning of the hop with Jamie at Glitter, Stamps and Paper, Oh my!
If you arrived here from Ellen at Card Monkey than you are in the right place!
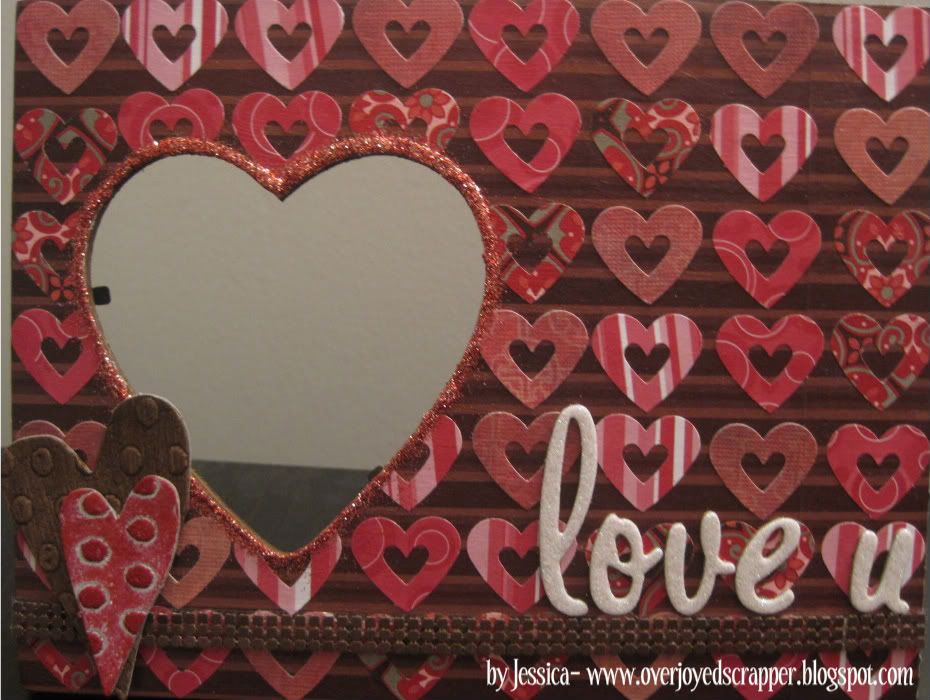
I decided to do something simple this time. I created an altered picture frame. I have made quite a few of these in the past and I just love doing them. I was creating this for my husband, but I'm afraid I might have made it a little too girly. I tend to have that problem. LOL! I started with a cheapy frame I bought at Michael's for a dollar.
Then I painted the edges and back with a chocolate brown paint. I did two coats to get it to the color I wanted. I don't take the time to paint the front because I will end up covering it with paper anyways.
From there I covered the front with a chocolate brown stripped pattern paper. Then I used an exacto knife to cut out the opening. It didn't turn out very clean so I have a plan for that later.
For there I punched out hearts from four different patterned papers. I covered the whole picture frame with the hearts. I then put a thick layer of gloss mod podge over all the hearts. From there I added glitter around the outside of heart shaped picture opening. Then I emblished it a little. I haven't chosen a picture for it yet, but I will later.
Thanks for looking! Hope you enjoyed my little project. Now it is time to hop on over to Casey at Simple Joy Crafting. She is sure to have something fantastic waiting for you.
In case you get lost along the way:
1. Jamie at Glitter, Stamps, and Paper, Oh My! http://glitterstampsandpaperohmy.com
2. Karel at One by One The Flamingos Are Stealing My Sanity http://karelj.blogspot.com
3. Nikki at The Glamorous Side of Scrapping http://glamoroussideofscrapping.blogspot.com
4.Elizabeth at Skittles and Scrapbooks http://skittlesandscrapbooks.blogspot.com
5. Brittni at Life's Musings http://gardenwhispers.blogspot.com/
6. Jesi at Jesi's Things http://jesisonaroll.blogspot.com/
7. Ellen at Card Monkey http://cardmonkey-business.blogspot.com
8. Jessica at Overjoyed Scrapper http://overjoyedscrapper.blogspot.com <<----- YOU ARE HERE!!
9. Casey at Simple Joy Crafting http://simplejoycrafting.blogspot.com
10. Jenny at Crazy about Cricut http://www.crazyaboutcricut.blogspot.com/
11. Shannon at My Scrappy Creations http://shannonleffew.blogspot.com/
12 Meagan at Beyond Paper http://beyondpaperdesigns.blogspot.com
13. Jessica at Creative Stamper http://thecreativestamperspot.blogspot.com
14. Jill at The Scrapaholic http://thescrapaholic.blogspot.com
15. Katy at Crazy Mommy Katy http://crazymommykaty.blogspot.com
16. Aimee at http://www.littlepsmomma.blogspot.com/
17. Kathy at http://kathyand3kids.blogspot.com
18. Amanda at Something Sorta http://somethingsorta.blogspot.com
19. Michelle at Holy Cricut http://queenofmycraftroom.blogspot.com
20. Kathy at www.kathy-thebeautifullife.blogspot.com.
21. Angie at http://atuttletime.blogspot.com.
Subscribe to:
Posts
(
Atom
)